A vending machine installation should be planned before the machine is shipped, not after it arrives. Buyers need to confirm the delivery route, unloading equipment, final position, power, network, payment setup, ventilation, operating access, and acceptance tests for the exact machine and venue.
A machine can pass factory testing and still face a delayed launch if it cannot pass through a doorway, connect to the local payment account, receive a stable network signal, or operate safely in the proposed position. This checklist helps buyers identify those risks early.
Quick Answer
Before installing a vending machine, confirm:
- The packed machine can be unloaded and moved through every door, corridor, elevator, and turn.
- The final floor position is level, suitable for the machine’s weight, visible to customers, and accessible for servicing.
- Voltage, frequency, plug, grounding, circuit capacity, and cable routing match the confirmed machine.
- Wi-Fi, Ethernet, or mobile-network signal works at the exact installation point.
- The payment terminal, merchant account, currency, settlement, and test process are ready.
- Water, drainage, ventilation, refrigeration clearance, or exhaust requirements are available where applicable.
- Products, ingredients, cups, packaging, cleaning materials, tools, keys, and staff are ready for commissioning.
- The buyer and supplier agree on acceptance tests, training, support contacts, spare parts, and unresolved items.
Requirements depend on the machine model, configuration, destination, product, and venue. Use the supplier’s final drawings and written order documents rather than a generic checklist alone.
1. Confirm the Exact Machine Configuration
Start with the machine that was actually ordered. Product-page information or an earlier quotation may not reflect the final payment hardware, branding, voltage, software, or accessories.
Create one installation record containing:
- manufacturer and model;
- serial number when available;
- final machine dimensions;
- packing dimensions;
- net and gross weight;
- voltage and frequency;
- rated power and recommended circuit requirements;
- plug type;
- payment terminal;
- network method;
- screen language;
- software account;
- accessories and spare parts;
- water, drainage, ventilation, heating, or refrigeration requirements;
- final product or ingredient format.
If you are still comparing equipment, review the available commercial vending machine categories before preparing a model-specific installation plan.
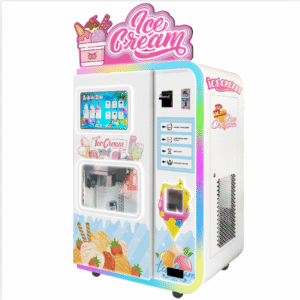
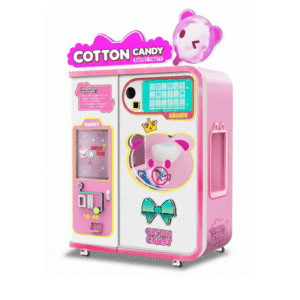
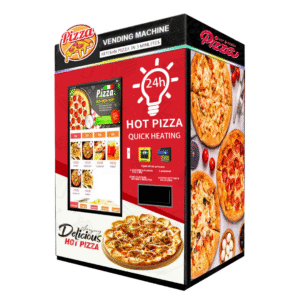
Do not assume that two machines in the same category have the same site requirements. A packaged-snack machine, smoothie machine, pizza machine, coffee machine, ice cream machine, and custom retail machine may require very different access, power, cleaning, and operating arrangements.
2. Measure the Complete Delivery Route
The final machine position may have enough space while the delivery route does not. Measure the packed machine route from the vehicle to the installation point.
Record every restriction
Check:
- loading dock or roadside unloading area;
- curb, ramp, step, slope, or uneven surface;
- exterior and interior door width and height;
- reception gates and security barriers;
- corridor width;
- tight corners;
- elevator door and cabin dimensions;
- elevator weight limit;
- floor transitions and thresholds;
- ceiling height;
- distance from unloading point to final position.
Compare these measurements with the packed dimensions, not only the unpacked machine size. Confirm whether the crate or protective packing must be removed before passing a restriction and whether there is a safe area to do that.
Arrange the correct unloading equipment
Depending on the machine and delivery method, the receiving team may need:
- a loading dock;
- forklift;
- pallet jack;
- tail-lift or liftgate vehicle;
- machinery skates;
- protective floor covering;
- lifting straps;
- trained movers;
- temporary storage space.
Confirm who supplies each item and who is responsible for moving the machine inside the building. “Delivery to address” does not always mean placement at the final indoor position.
3. Approve the Final Machine Position
Mark the exact position on a floor plan or site photograph. Avoid approving only a general area such as “near the entrance.”
The position should be checked for:
- customer visibility;
- safe customer access;
- sufficient opening space for doors and service panels;
- refill and cleaning access;
- ventilation clearance;
- level floor;
- nearby power;
- stable network signal;
- lighting;
- security and camera coverage where required;
- protection from rain, direct sunlight, heat, moisture, dust, or corrosive conditions;
- compliance with venue access and emergency-route rules.
Allow space for the operator, not only the customer. Staff may need to open a large front door, remove ingredient containers, load products, clean internal areas, collect cash, or access components.
For outdoor or semi-outdoor use, obtain written confirmation that the selected model and enclosure are suitable for the real environment. A canopy alone does not automatically make an indoor machine suitable for outdoor operation.
4. Verify Power Before Delivery
Ask a qualified local electrician to confirm the site when necessary. The machine specification and local electrical requirements control the final setup.
Verify:
- voltage;
- frequency;
- plug and socket type;
- grounding;
- circuit capacity;
- dedicated circuit requirement;
- cable length and safe cable route;
- isolation switch where required;
- surge protection;
- backup-power needs, if any;
- whether other high-load equipment shares the circuit.
Do not use an adapter or extension cable as a permanent solution unless it is specifically approved for the machine and local installation.
For machines with refrigeration, heating, motors, compressors, pumps, or other high-load components, the electrical behavior during startup may differ from normal operation. Ask the supplier what the site electrician needs to know.
5. Check Water, Drainage, Ventilation, and Temperature
These requirements vary greatly by machine type.
Water and drainage
For machines using water or liquid ingredients, confirm:
- water source and connection type;
- water quality or filtration requirements;
- inlet pressure;
- drainage point;
- drain height and route;
- leak protection;
- cleaning-water disposal;
- whether a tank system or direct connection is used.
Ventilation and ambient conditions
For refrigerated, frozen, heated, or food-preparation equipment, confirm:
- required clearance around vents;
- permitted ambient-temperature range;
- heat sources nearby;
- direct sunlight;
- airflow;
- humidity;
- dust or grease exposure;
- condensation management.
Insufficient ventilation can affect cooling or heating performance even when the machine itself is functioning correctly.
6. Test the Network at the Exact Position
Do not test Wi-Fi or mobile signal only at the venue entrance. Test at the machine’s final location, with doors and nearby equipment in their normal positions.
Confirm:
- Wi-Fi name and password;
- signal strength;
- Ethernet port and cable route;
- mobile-network coverage;
- SIM ownership and data plan;
- venue firewall or IT approval;
- device registration requirements;
- remote-management login;
- who receives alerts;
- what happens when the connection is temporarily lost.
If the machine uses a cloud dashboard, payment terminal, remote advertising, stock monitoring, or fault alerts, the local network and account permissions must be ready before commissioning.
7. Prepare the Payment System
Payment commissioning often requires work from the buyer, payment provider, local bank or acquirer, venue IT team, and machine supplier.
Before delivery, confirm:
- payment methods required at the venue;
- payment terminal model;
- country and currency compatibility;
- merchant-account owner;
- application and approval status;
- settlement bank account;
- transaction fees;
- SIM or network requirements;
- test cards or test process;
- receipt or tax requirements;
- refund procedure;
- support contact for failed transactions.
The machine interface may support a payment device, but that does not guarantee that the provider will activate an account in every country. Review the vending machine payment systems guide and obtain written confirmation for the destination market.
During commissioning, test successful payment, cancellation, timeout, failed dispense handling, and transaction reporting where supported.
8. Prepare Products and Consumables
Use the actual products or ingredients planned for operation. Substitute items may not have the same size, weight, packaging, temperature, flow, or dispensing behavior.
Prepare:
- approved products or ingredients;
- cups, lids, straws, spoons, trays, bags, or other packaging;
- labels and prices;
- recipes or portion settings;
- cleaning materials;
- food-safe tools where applicable;
- refill containers;
- waste containers;
- temperature-monitoring tools where required;
- opening stock record.
Check product dimensions, orientation, expiry dates, storage conditions, and refill method. Test more than one selection or recipe. A successful test from the easiest position does not prove that every configured selection works correctly.
9. Define Installation and Commissioning Responsibilities
Write down who is responsible for each task.
| Task | Buyer or Operator | Venue | Local Contractor | Supplier |
|---|---|---|---|---|
| Site measurements | Confirm | Support access | Verify when needed | Review against machine data |
| Unloading and indoor movement | Arrange or confirm | Approve route | Perform when contracted | Provide packing data |
| Power and utilities | Confirm | Authorize | Install and certify | Provide requirements |
| Network | Prepare account/access | Coordinate IT | Install if needed | Provide connection requirements |
| Payment account | Apply and activate | Provide site details if needed | Support local setup | Confirm device/interface |
| Product loading | Prepare and perform | Approve products if needed | — | Provide operating guidance |
| Functional testing | Participate and record | Witness if required | Support utilities | Provide test steps/support |
| Training | Assign real operators | Assign relevant staff | Attend if responsible | Provide agreed guidance |
The final responsibilities depend on the sales agreement and selected support scope. Do not assume that the manufacturer, freight company, customs agent, building manager, or local installer will perform work that is not written into their scope.
10. Run a Structured Acceptance Test
Before public operation, test the complete customer and operator workflow.
Physical and configuration checks
- Compare the model and serial number with the documents.
- Check exterior condition before removing all packing.
- Photograph the crate and machine during receiving.
- Verify voltage, plug, screen language, branding, and payment hardware.
- Count keys, accessories, manuals, and spare parts.
- Confirm the machine is level and stable.
Functional checks
- Power the machine on using the approved supply.
- Review startup messages and error codes.
- Test the touchscreen and customer instructions.
- Test representative selections or recipes.
- Check product dispensing and pickup.
- Test refrigeration, heating, mixing, cleaning, lighting, sensors, or other configured functions.
- Test each active payment method.
- Confirm prices and transaction records.
- Check the dashboard, alerts, and machine identification.
The exact checklist depends on the machine. Buyers can use the Yumboxs quality control and pre-shipment testing guidance to align factory evidence with the on-site acceptance plan.
Record every unresolved item with:
- description;
- photo or video;
- date;
- responsible party;
- temporary workaround, if safe;
- target resolution date;
- final closure confirmation.
11. Train the People Who Will Operate the Machine
The person receiving training should include the person who will refill, clean, inspect, and respond to routine problems.
Training should cover:
- startup and shutdown;
- product or ingredient loading;
- stock rotation;
- cleaning schedule;
- waste handling;
- payment status;
- dashboard use;
- price changes where authorized;
- keys and door access;
- basic fault checks;
- safe reset procedure;
- customer refund escalation;
- spare-parts identification;
- supplier support contact;
- when to stop operating and request technical help.
Keep a short local operating procedure near the machine or in a shared digital folder. Include model, serial number, location, support contact, cleaning responsibilities, and escalation steps.
12. Complete the Handover Record
The handover record becomes the baseline for operation, warranty communication, and future troubleshooting.
Include:
- machine model and serial number;
- installation address and exact position;
- installation date;
- buyer, venue, installer, and supplier contacts;
- voltage and utility details;
- payment terminal and account status;
- network method;
- dashboard account owner;
- products and prices loaded;
- keys, manuals, accessories, and spare parts received;
- completed tests;
- training participants;
- site photographs;
- unresolved items;
- warranty and support references.
Keep the final quotation, order confirmation, packing list, shipping documents, manuals, test evidence, and support terms together. The Yumboxs shipping, installation, and after-sales support page explains which project details should be confirmed in writing.
Practical Buying Tips
- Send site photos and measurements to the supplier before production.
- Request final packed dimensions and gross weight before booking delivery.
- Test network strength at the exact machine position.
- Begin payment-account setup early; hardware delivery does not guarantee account activation.
- Use the real product during commissioning.
- Assign one person to own the installation checklist.
- Photograph receiving condition before discarding the packing.
- Keep a written open-issues list instead of relying on chat messages.
- Monitor the machine more frequently during its first operating week.
- Do not open to customers until payment, dispensing, cleaning, and support procedures are understood.
Common Installation Mistakes
Measuring only the final floor space
The machine fits the location but cannot pass through a doorway, turn, elevator, or security gate.
Using unpacked dimensions for delivery planning
The crate or pallet may be significantly larger than the machine and require different handling equipment.
Leaving payment setup until installation day
The machine may be operational while the merchant account, local provider, SIM, or settlement process remains incomplete.
Assuming venue Wi-Fi will work
Guest Wi-Fi, weak signal, firewall restrictions, or device-registration policies can prevent the machine or terminal from connecting.
Ignoring service clearance
The machine looks well positioned, but its door, ingredient area, ventilation panel, or service components cannot be accessed.
Testing only one transaction
One successful vend does not verify all selections, recipes, prices, payment methods, alerts, or failure conditions.
Failing to assign operating responsibility
Cleaning, refilling, refunds, and fault response are delayed because the buyer, venue, and supplier each expect another party to act.
Yumboxs Experience
From our experience working with overseas buyers, installation problems often begin with information gaps rather than a single machine component. The machine configuration, shipping plan, building access, local utilities, payment account, and operator workflow need to match.
Providing the destination, site photographs, access measurements, voltage, payment requirements, network plan, product format, and expected launch date before production gives the supplier a better basis for confirming the configuration.
Buyers should still verify every project-specific requirement in the final quotation, drawings, order documents, manuals, and local professional advice. Requirements vary by model and destination.
FAQ
What should be ready before a vending machine is delivered?
Prepare the unloading method, indoor delivery route, final position, power, network, payment account, utilities, actual products, cleaning materials, responsible staff, and acceptance checklist.
Who installs a vending machine?
Responsibility varies by supplier, freight term, machine type, and location. Installation may involve the buyer, a local mover, electrician, plumber, IT contact, payment provider, venue team, and remote or on-site supplier support. Confirm the scope in writing before shipment.
Does a vending machine need a dedicated electrical circuit?
It depends on the machine’s rated power, startup load, local electrical rules, and other equipment on the circuit. Use the exact specification and ask a qualified local electrician when required.
Does factory testing replace on-site testing?
No. Factory testing checks the machine and agreed configuration before shipment. On-site commissioning checks the real power, network, payment environment, products, building access, and operator workflow.
When should the payment system be tested?
Start account preparation before delivery and perform live or approved test transactions during commissioning. Confirm settlement records, cancellation, failed-payment handling, and the response to a paid but failed dispense where supported.
How long should a vending machine be monitored after installation?
Monitor it closely during the initial operating period. The exact period depends on transaction volume and machine type, but early checks should focus on payments, dispensing, stock, cleaning, alerts, customer questions, and site conditions.
Prepare Your Installation Before Requesting Delivery
Before finalizing a vending machine order or delivery plan, prepare the destination, machine location, access measurements, voltage, network method, payment requirements, product format, utilities, and expected launch date.
If you are planning a commercial project, contact Yumboxs with those details so the applicable machine configuration, packing, shipping, and support scope can be confirmed in writing.